Tuning, předělávky

Pravidla fóra
Prosím opravte si obrázky které se špatně zobrazují nebo jsou nefunkční. Jinak budou z příspěvků odstraněny administrátorem.
Odpovědět
BaRT
Site Admin
Příspěvky: 10238
Registrován: 30 dub 2009, 21:50

Re: Tuning, předělávky

Příspěvek od BaRT »

Našel jsem stránky s úpravou modelů.
Většinou změna světlé výšky, je o to zájem tom dávat?

Ukázka
Shelby GT500 (Auto ART)
BMW F10 & F11 (Norev)

Ten Norev je pěkný že se nemusí nic demontovat, jako nápad pěkný.

The Shelby GT500 is a good model, but the height makes it look worse.

This is how it looks when you buy it (pictures are from the net):

Obrázek

In person it looks higher than in pictures, at least my GT500.

Obrázek

Obrázek

First of all we have to remove the 6 screws on the underside, and remove too the exhaust pipes. They are glued and is easy to remove them without risk.

Obrázek

Obrázek

We have to separate the chassis from the body, swinging both parts on the back wheel arches carefully...

Obrázek

...but first we have to help to pass the grey piece above the engine to save the engine and can separate both parts

Obrázek

When we have the body separated we can separate the engine compartment by pressing on the cupels.

By removing a screw, we can remove the engine from the chasis:

Obrázek

And removing 2 more screws, we can separate the front axle from the chassis:

Obrázek

We have to sand the top of the wheel that fits to the chassis:

Obrázek

Then, put it on its place:

Obrázek

It's a bit high :?:

Obrázek

We can sand a part of the chassis for lower the height:

Obrázek

Obrázek

To put it on its place the driving direction must be above the black piece (red arrow):

Obrázek


The back axle is fixed by 2 screws. We have to remove them:

Obrázek

Then we can remove the dampers

Obrázek

Obrázek

We can too remove both springs

Obrázek

and cut them

Obrázek

but it won't work:

Obrázek

We have to remove the back axle from the chassis.
We can remove the line shaft without removing exhaust line. Helping us with a small screwdriver:

Obrázek

Then we have to pull from the wheels:

Obrázek

Obrázek

Then we have to cut 3 or 4 mm the part where the springs are placed (left-cut/right-not cut):

Obrázek

To complete the process we have to cut the dampers:

Obrázek

Then we have to put the parts on its places and we have the chassis modified:

Obrázek

I put the engine compartment on the body, but you can put it on the chassis:

Obrázek

By doing the same process to separate the chassis from the body but the other way around, saving the grey part on the top of the engine:

Obrázek

This is the final result:

Obrázek

Obrázek

Obrázek

Obrázek

Obrázek

And the studio photos:

Obrázek

Norev BMW F10 and F11.

The distance is too big between the front tire and the fender. The Norev made them just like the offroad cars!
Obrázek

You need an empty air-freshener's sprayer part.
Obrázek

The sprayer part. (You can use a plastic tube instead of this, of course.)
Obrázek

Cut two pieces of the thinner tube of the sprayer part. You need about 2 or 2,5 mm thick for the F10, and about 1 or 1,5 mm thick for the F11.
BE CAREFUL WITH THE SHARP BLADE!!!
Obrázek

Cut out a little piece from the oval ring's longer side.
Obrázek

Put the car upside down on a soft textile. Push the suspension and hold in this position. Be careful with the little car parts for example mirrors, etc.
Obrázek

Put the little oval ring with a nipper into the suspension's vertical axis.
Obrázek

Click-it onto the vertical axis. It's not so easy to do.
Obrázek

The oval ring is in the right position.
Obrázek

You're ready! Well done! :ok2:
Now you can see the correct distance between the tire and fender. Please compare the first picture with the last!
Obrázek
Sbírka modelů Citroën

sva57
Příspěvky: 6443
Registrován: 01 kvě 2009, 20:01
Bydliště: Brno
Kontaktovat uživatele:

Re: Tuning, předělávky

Příspěvek od sva57 »

No jasný že jo ;) :)

BaRT
Site Admin
Příspěvky: 10238
Registrován: 30 dub 2009, 21:50

Re: Tuning, předělávky

Příspěvek od BaRT »

Video návod na doplnění osvětlení do AA

http://www.youtube.com/watch?v=8p1LnwWfDqU#t=616

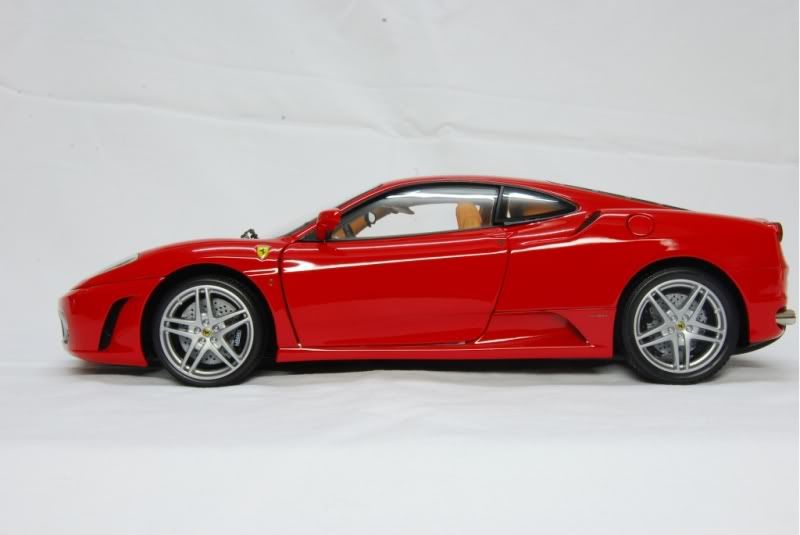
F430 BBR
This is an easy diy to solve a problem with some F430s by BBR. In my case, it has an high height on the front, but higher on the left wheel:

Right:

Obrázek

Left:

Obrázek

The suspension of this car is one of the best I've ever seen, but with the high height the final result is worse that it deserves.

My F430 has close 40mm high on the left side:

Obrázek

It seems like a SUV :broken2:

Obrázek

Well, I cut a piece of plastic of 0.5-1 mm thick and put it below the front suspension, like this:

Obrázek

And then, pressing the suspension, you have to move the plastic to the inside, just below the gray piece:

Obrázek

Do it again on the other side and you will obtain a great result:

Obrázek

It's 3mm lower:

Obrázek

Finally:

Obrázek


You can do it also on the back suspension. I did it on the left side because my F430 was higher too on this side. It's an easy procedure and if it doesn't satisfy you, you can remove it easily
Sbírka modelů Citroën

BaRT
Site Admin
Příspěvky: 10238
Registrován: 30 dub 2009, 21:50

Re: Tuning, předělávky

Příspěvek od BaRT »

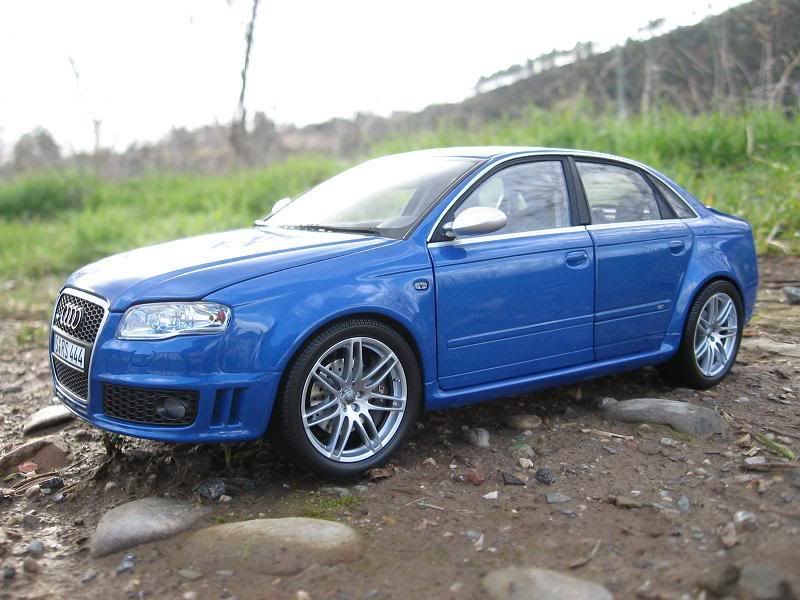
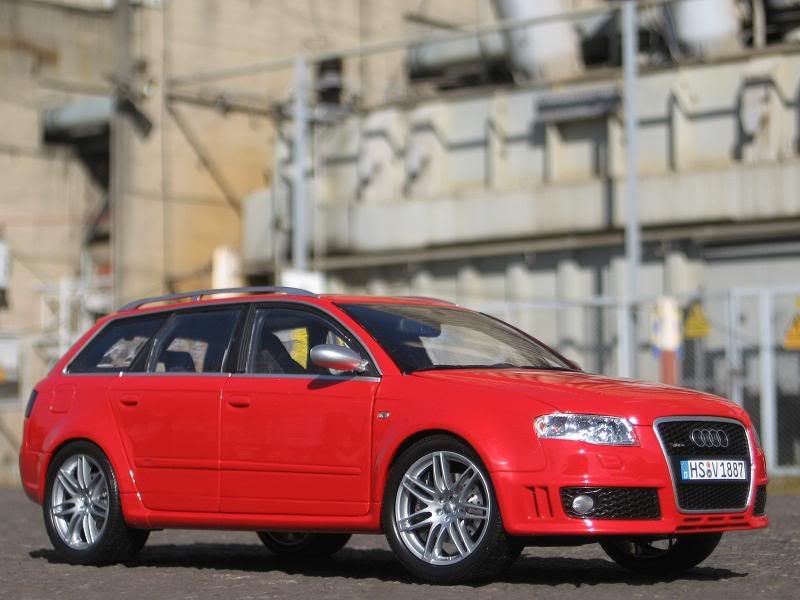
Another good car with problems. The Minichamps Audi RS4
is a very good miniature, but has big tires and doesn't look as nice as the real car. With this brico you can do it to look better, easyly or a bit harder, as you want.

This is how the car looks when you buy it (these two pictures are by Alexknight):

Obrázek

Obrázek

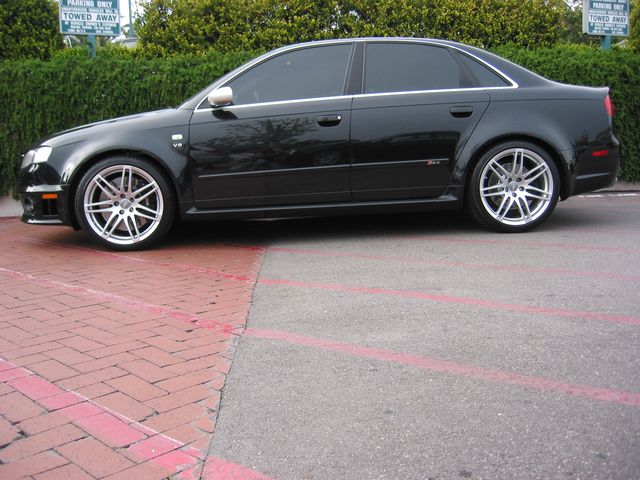
And this is the real car:

Obrázek

First of all, you must have the car :hehe: I followed some steps of this thread: http://www.diecastxchange.com/forum1/to ... -audi-rs4/.

The first step is remove the old tires. You have to take care, and is better to heat them with a hairdryer to make the rubber softer. When I first modified the car (I did it for 3 times), I broke a part of the back axle (as you can see in the pictures). because I didn't heat the tires. I bought 4 new tires of 15 mm width, 35 mm outer diameter and 28 mm inner diameter.

This are my tools:

Obrázek

Obrázek

-Screwdrivers
-New tires
-Tube of rubber
-Milimeter rule
-Pliers
-Glue
-Cotton swabs
-Tweezers

Here are the tires, on the left the new one and the old one on the right:

Obrázek

And this is how they look like (old/new):

Obrázek

First we remove the screws from the chassis. There are 6 screws. There are 4 bellow the rims, so you have to take care removing them.

Obrázek

I will explain differents ways to do it, divided in front axle and rear axle.

In progress

-Front axle:
*easy (not recommended)
*harder
-Rear axle:
*easy
*harder
-Modify steering stop.
-Final result.

"](I don't recommend this option, because the springs are strong and could crush the rubber piece in the future)

Here you can see the screw of the front suspension:

Obrázek

Screw removed:

Obrázek

I cut a 3 mm pieces of the tube of rubber and I put it pressing the suspension to make the plastic part move up:

Obrázek

While pressing I put the screw.

This is the car with 2 mm of rubber in the front:

Obrázek

And this is with 3 mm:

Obrázek

Before:

Obrázek

After:

Obrázek

(This is the option that I recommend)

First, remove two screws (red arrows) on the front of the chassis. Then, you have to press where yellow arrows are with a thin screwdriver to separate the parts:

Obrázek

Obrázek

Here are the parts involved in this step:

Obrázek

We cut the springs (Longest is how it looks before, the one that is in the middle is how I cut it, the shortest is from a R5 GT Turbo):

Obrázek

Is better to cut a little bit more, as I did the second time:

Obrázek

These plastic parts are named "R" and "L" but for me are equal.

Obrázek

(the next step is optional, but highly recommended)

I cut two pieces of the tube of rubber of 1.5 mm (the first time I used a part of a pen, as you can see in the first picture):

Obrázek

Then I cut in one side:

Obrázek

With loads of patience, I placed the pieces bellow the wheel, to make it go up:

Obrázek

In the RS4 Avant you can do it easier cause you can remove the piece on the picture:

Obrázek

Helping me with a cotton swab, I glued the rubber pieces (because rubber is too soft) to assure that it won't move. You have to take care and use a small amount of glue.

Obrázek

Obrázek

(end of the optional steps)

When we finish, we put the suspension pieces on their place, and with lots of patience, we have to unite the chasis with the body of the car. It's a bit hard step, but with some practice you will do it fast and safe.

Obrázek

Final result:

Obrázek

Obrázek

We can see the screw of the back suspension:

Obrázek

I cut a piece of rubber of 2 mm:

Obrázek

Then remove the screw, and as we did (or better not) press the suspension en put the rubber piece on the plastic cylinder of the suspension. Then we put the screw:

Obrázek

And this is how the Avant looks. It has some glue and we have to take care when we split the body and the chassis:

Obrázek

Here you can see how the car looks with a rubber piece of 3 mm:

Obrázek

And here with 2 mm (better):

Obrázek

Obrázek

Obrázek

First you have to remove the amount of glue (removed on the left, not removed on the right). I did it with a scredriver.

Obrázek

Then you can remove the exhaust line with some press in the places where you removed the glue:

Obrázek

Obrázek

We repeat the process in the middle of the chassis (left, glue removed/right, glue not removed):

Obrázek

Now you can remove the exhaust line.

Then you have to remove a pair of screws (yellow arrows):

Obrázek

Remove the screws of the suspension if you haven't done it yet. Now you can separate the chassis and the suspension, but only a bit, because the line shaft is attached to both parts. But is a bit flexible. If you brake it, there's no problem, because when you put the exhaust line the line shaft will be hidden.

Obrázek

Springs are shorter and softer than on the front axle:

Obrázek

I cut only a bit:

Obrázek

Then you have to put them on their place:

Obrázek

And then, we unite both parts again. This is how it looks:

Obrázek

Obrázek

You can combine this step with the previous, but is better use a 1 mm piece of rubber instead of 2 mm:

Obrázek

The exhaust line could be placed in its place easily. Then we could glued it:

Obrázek

Obrázek

Obrázek

Obrázek

Left-not modified/Right-modified:

Obrázek

Obrázek

Obrázek

Final pictures:

Obrázek

Obrázek

Obrázek

Obrázek

Obrázek

Obrázek

Obrázek

And you can see better pics by clicking on the pictures bellow:

Obrázek

Obrázek

And together:

Obrázek

Obrázek

Obrázek
Sbírka modelů Citroën

BaRT
Site Admin
Příspěvky: 10238
Registrován: 30 dub 2009, 21:50

Re: Tuning, předělávky

Příspěvek od BaRT »

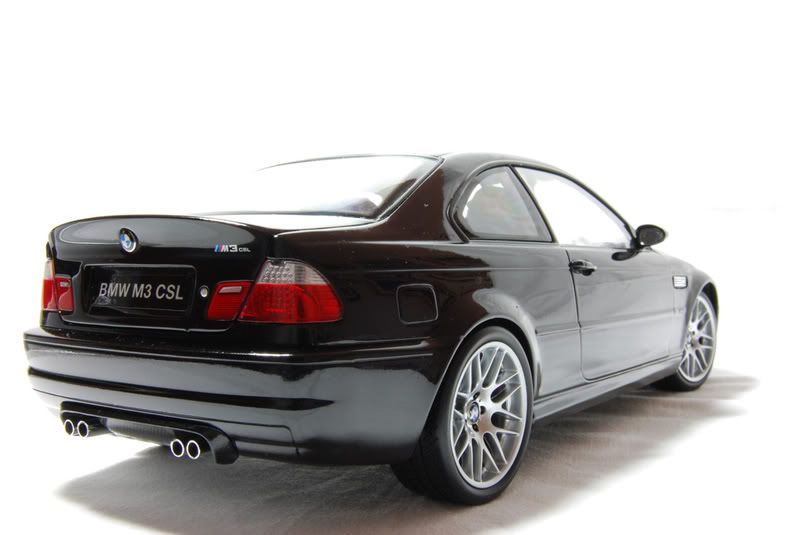
The BMW M3 CSL by Kyosho is a car that I love, but has a serious problem: the width of the front axle is not wide enough and wheels are hidden on body.

The car looked just like that before:

Obrázek

Obrázek

First of all, you have to pick some tools. Because I'm not usually modify cars, I don't have some tools to choose, but finally I find some of them to do this "brico". You can use the tools and material that you find at home.

I have a screwdriver, a scalpel, and a tube of rubber (a part of a catheter)

Obrázek

The first step you have to take is remove the logo at center of the wheel. I did it with the scalpel. Other mates that try to remove it said that logos aren't glued at the wheel, but in my case there are. At this step you have to be careful, cause you can damage logos.

Obrázek

After that step, you can remove the screw. I cut a piece of tube of rubber. I tried different widths, and then choose the one that I believed that was right. Then, I put the piece of rubber inside the wheel as you can see in this picture:

Obrázek

Obrázek

After, I put the wheel in the car, and search for a new screw, because the old screw is too short.

Obrázek

Obrázek

Obrázek

When I found it, I screwed it and then glued the logos at the centre of the wheels.

Obrázek

And this is the end. It's not difficult, and the result is good enough to try.

This is how the car looks like now:

Obrázek

Obrázek

You can see more pictures by clicking on the picture bellow:

Obrázek
Sbírka modelů Citroën

sva57
Příspěvky: 6443
Registrován: 01 kvě 2009, 20:01
Bydliště: Brno
Kontaktovat uživatele:

Re: Tuning, předělávky

Příspěvek od sva57 »

To F 430 BBR jsem už taky řešil-dal jsem mezi sopdní rameno a závěs podložku a je to rozhodně lepší než jak je uvedeno na snímku-podložení celého ramena ;)

Uživatelský avatar
Stevko86
Příspěvky: 942
Registrován: 06 led 2011, 18:35
Bydliště: Košice
Kontaktovat uživatele:

Re: Tuning, předělávky

Příspěvek od Stevko86 »

jasne, dávaj to tu :) tieto veci su podla mna dost zaujimave :)
modrý Mondial, pekný Mondial :)

BaRT
Site Admin
Příspěvky: 10238
Registrován: 30 dub 2009, 21:50

Re: Tuning, předělávky

Příspěvek od BaRT »

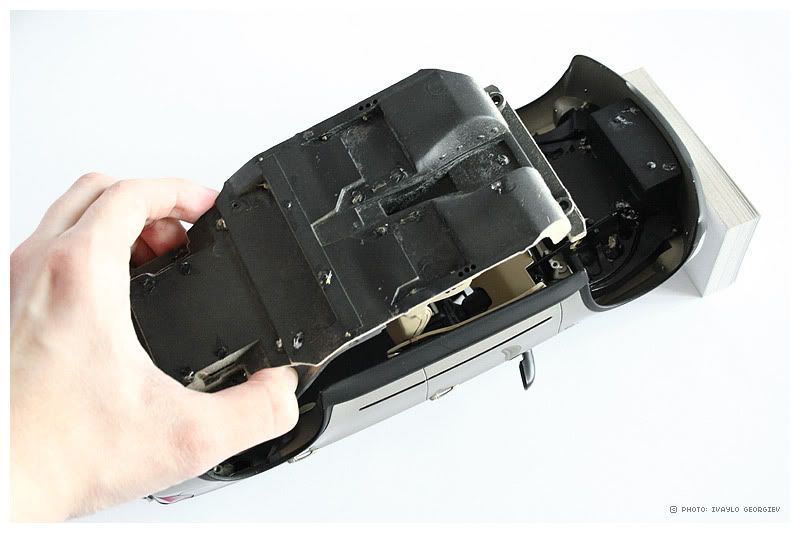
I've just decided to post a humble tutorial I made some time ago. :smile: I had to open my Kyosho BMW X5 E70 for a minor repair and I've decided to make photos of the process - maybe it'll be useful for somebody.

The steps may be different, depending on the model, but I think that most of them will be similar in most of the Kyoshos. Have in mind that you are doing this at your own risk! Be very, very careful and don't pull anything too hard. If something doesn't come out easily, probably you have to try to pull from another end.

It's good to have a soft towel on the table while unscrewing the chassis. This way you'll protect the roof and the windshield from scratching. Never push the model too hard when it's laying on its roof, because you can crack the windshield or some roof details! Also be careful with the side emblems, indicators, door handles and mirrors when you hold the model in your hands.
1. Taking off the wheels

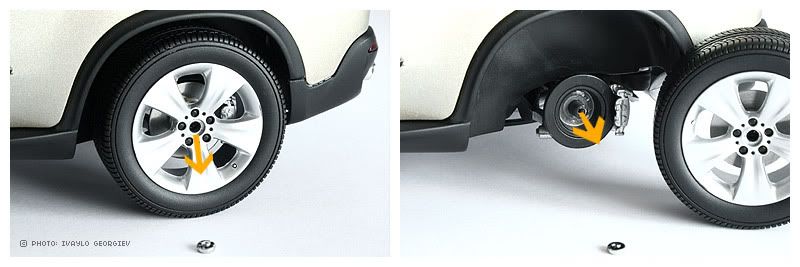
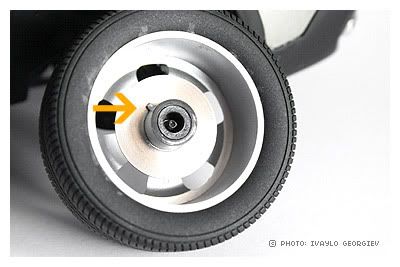
In many Kyosho models the wheels are mounted with screws to the axle. You have to use very thin pin and take off the rims' center caps. You'll see a small screw inside. When you unscrew it, you have to pull the wheel gently until the brake disk get out of the caliper. The disk is a free piece and it's not glued so it'll come off with some rotating and shaking.

Note this: there is a small plastic stub inside the rim which have to be aligned with a small hole in the metal brake disk. This is important when you are putting the wheel back on, because this way the disk and the wheel will rotate together.

This step is not always necessary if you want to unscrew the chassis, but it'll give you better access to the screws.

ObrázekObrázek

2. Removing the chassis

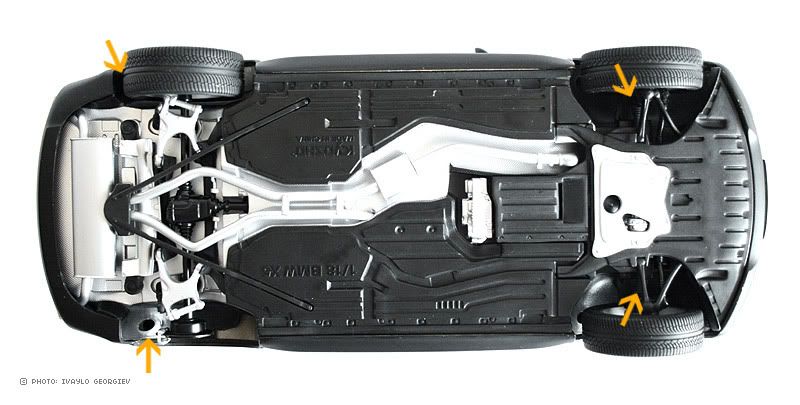
This is the hardest part. First you have to unscrew the 4 screws inside the wheel wells. After that pull the chassis carefully out of the bumpers without braking anything. :hot: The good news about this model is the steering wheel, which is made very clever so you can pull the chassis out, without a need to care about it.

Obrázek
Obrázek

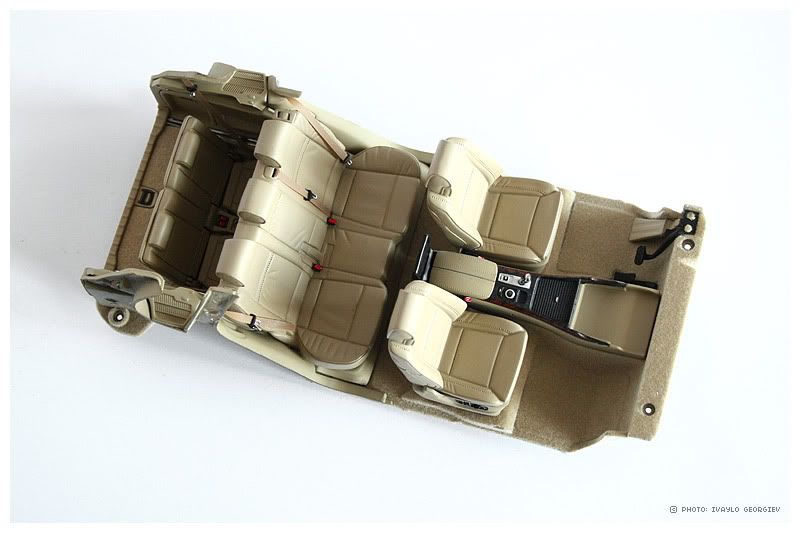
3. Removing the interior

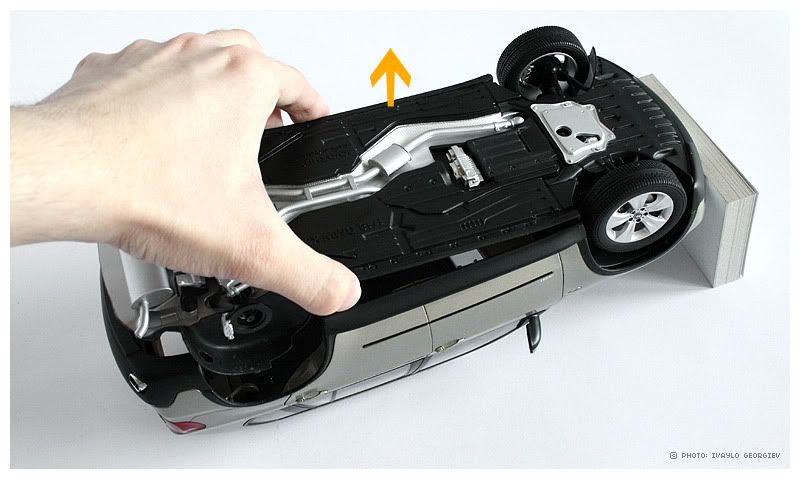
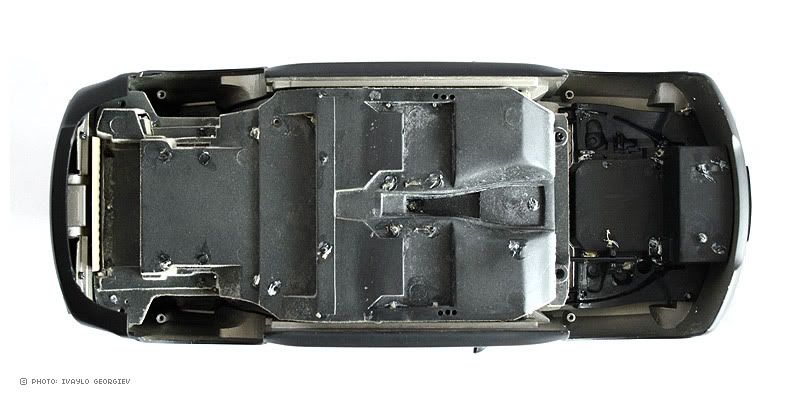
As you can see, there is nothing except the wheels, mounted on the chassis. Everything else, from the interior to the bumpers is attached to the body. There are 4 screws which hold the interior. When you unscrew them, you can push gently the interior's floor from the inside. I might be glued a little, but don't pull too hard!

Obrázek
Obrázek
Obrázek

4. Done...

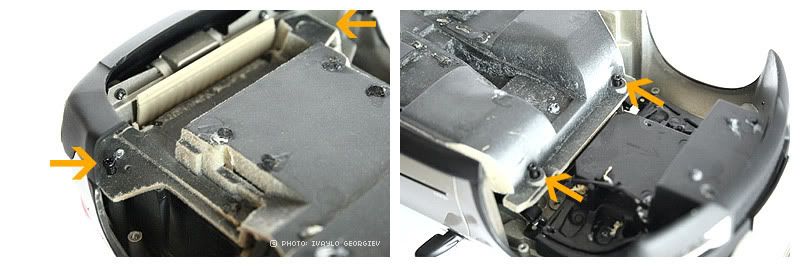
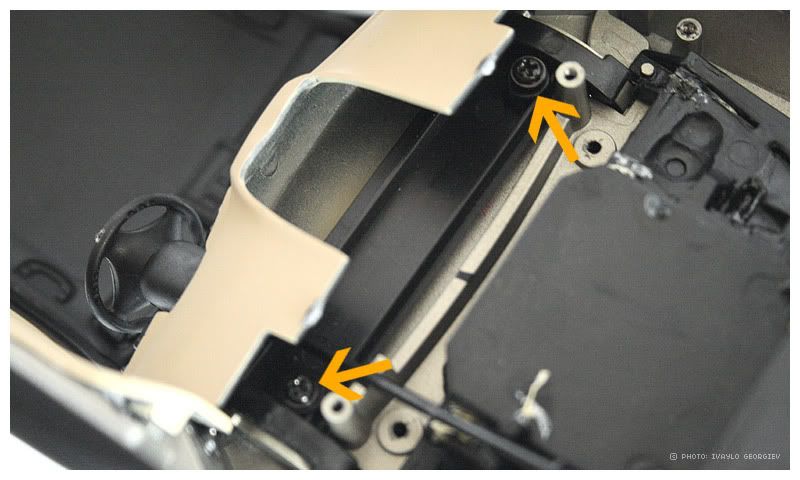
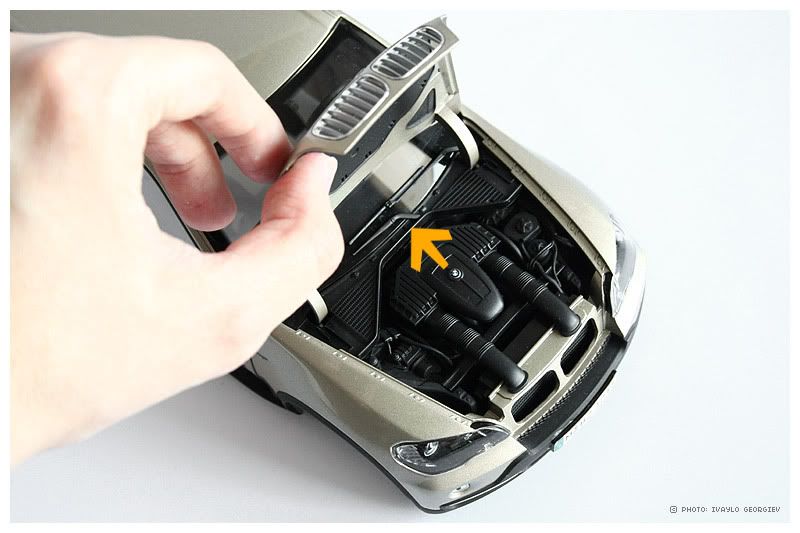
This is the main part - most of the elements are accessible now. If you want to uncover the engine, you have to unscrew these screws. This will loosen the hood and you can push it backwards and then upwards until it's out.

Obrázek
Obrázek

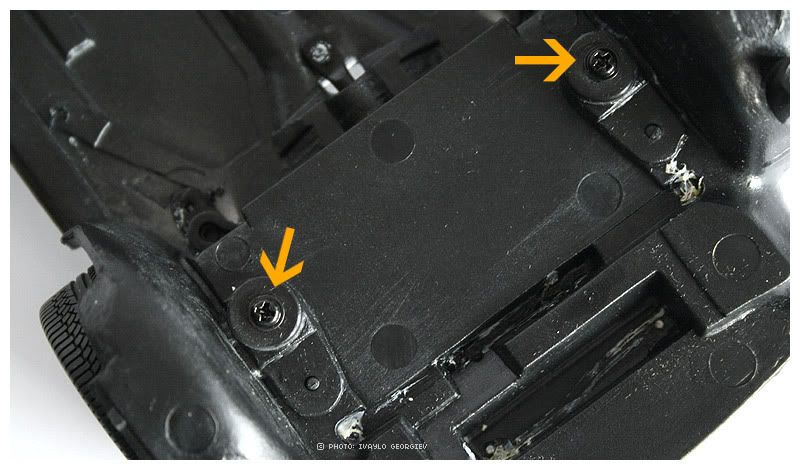
These screws inside the chassis are for the rear suspension's height. You can adjust it from here.

Obrázek

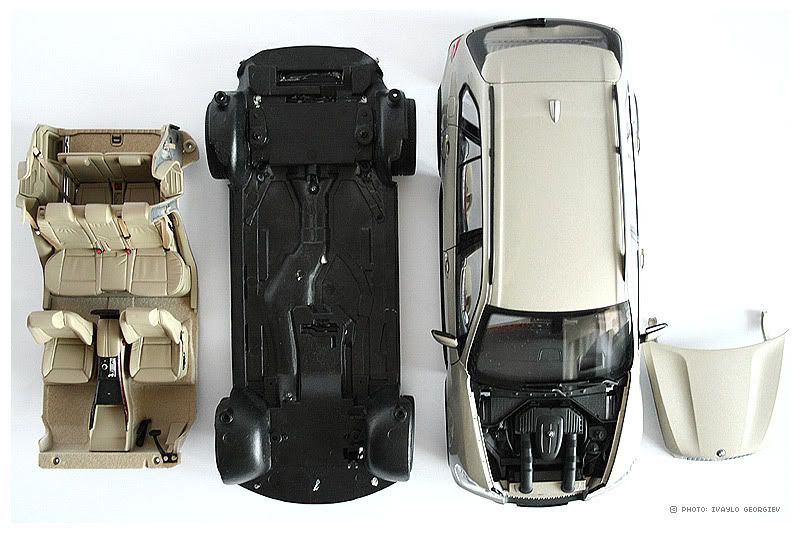
These are the main elements - pretty simple, huh? :ohmy:

Obrázek
Obrázek

The rest of the details are glued so you'll need to glue them back on if you decide to take them off.

I hope you find this tutorial useful.
Sbírka modelů Citroën

BaRT
Site Admin
Příspěvky: 10238
Registrován: 30 dub 2009, 21:50

Re: Tuning, předělávky

Příspěvek od BaRT »

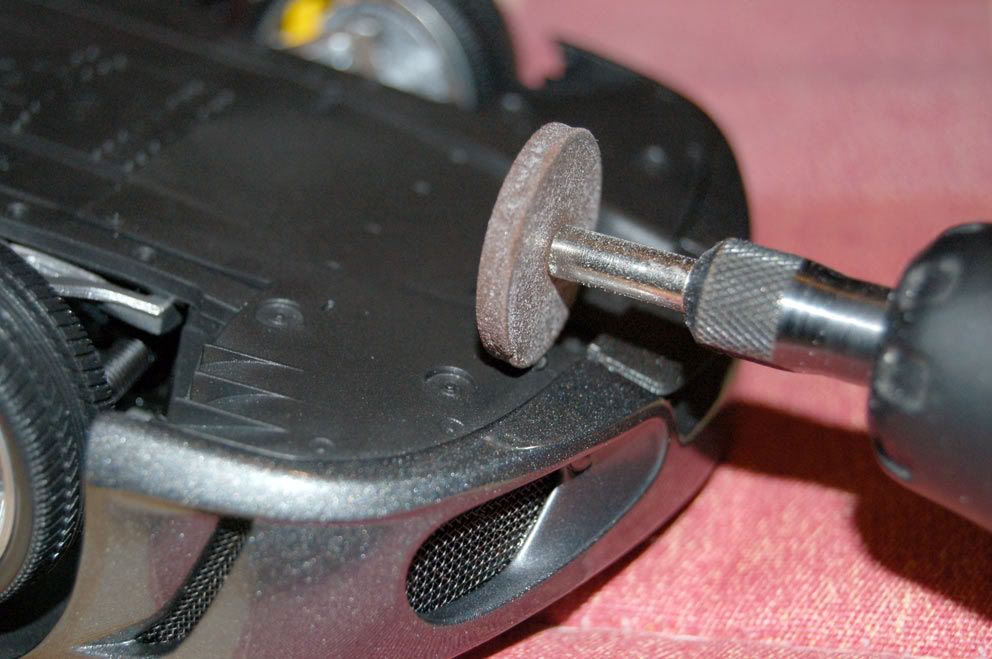
Hiding ugly button under BBR F430's front

Do you think that the button to open the front trunk in the BBR Ferrari F430 breaks the beautiful line of the car?

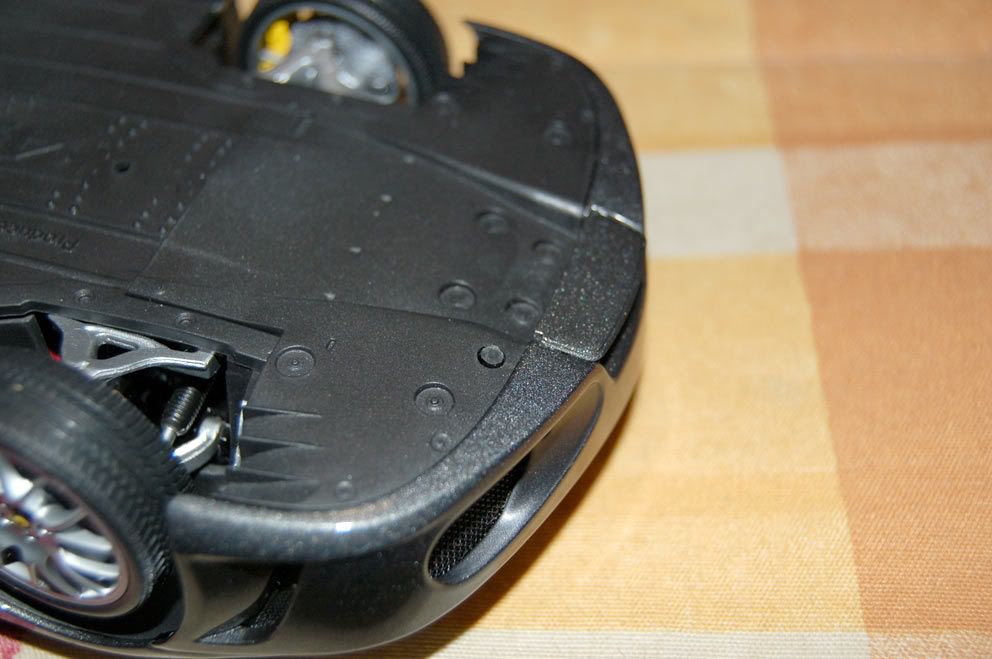
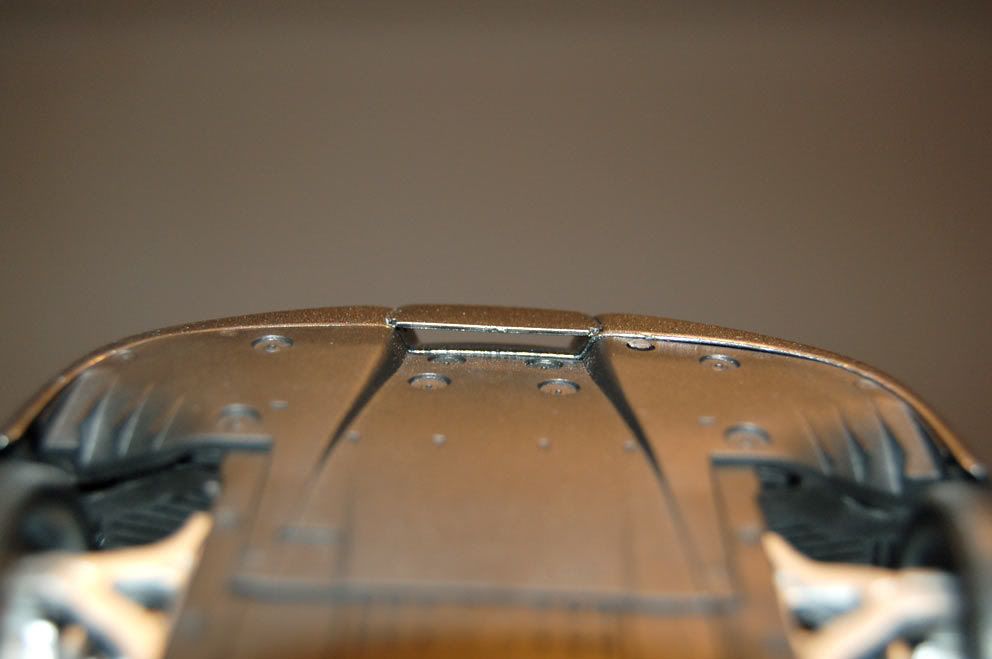
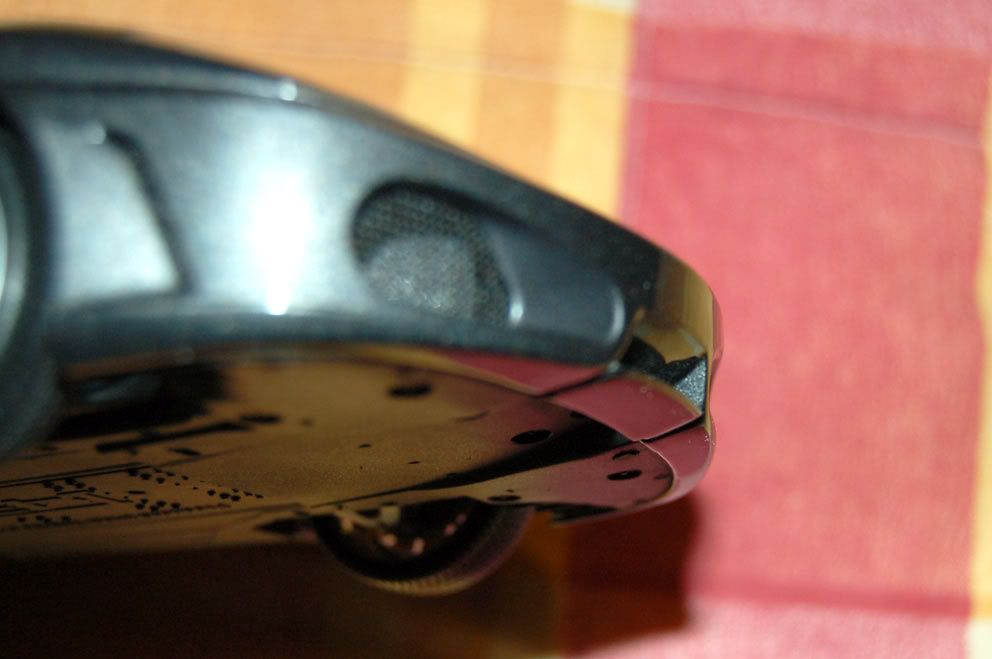
Then just get a Dremel (or similar tool) and start to sand the button, with care of not scratching any other part, until less than 1 mm of the button is visible. It still works, and it will not be visible anymore.

Obrázek
Obrázek
Obrázek
Obrázek

This is a work of 10 seconds, with excellent results
Sbírka modelů Citroën

BaRT
Site Admin
Příspěvky: 10238
Registrován: 30 dub 2009, 21:50

Re: Tuning, předělávky

Příspěvek od BaRT »

Návod na výrobu zrcátek, ty nálevky Vám prodají v každé vinotéce:

second subject,

anyone here buy sometime a 2nd hand scale model, on ebay or other internet shop...in good or bad(very bad) conditions(broken or missing parts), wheels broken off, wipers, mirrors, aerials, etc...

Obrázek
but how can you repair (fix) the mirror foil from a 1:12 or 1:18 scale model very simple.

you find in every supermarket 'wine drop stop'
Obrázek

cut it carefully the shape of the mirror out the foil 'stop drop' with a precision knife or scissor.

When your finished with cutting the shape, take glue and paste...
Obrázek

i hope with this tip, that i makes you're happy :D
Sbírka modelů Citroën

Odpovědět

Zpět na „Sběratelské modely 1/18“